


Nope, that’s not a typo, and it’s not a scam. I know you’ve probably been struggling somewhere on Wix trying to change a button or Squarespace getting frustrated with a layout – so you might not believe me at first when I say you can seriously build your website in just ONE day.
And if you’ve ever gotten a quote from a custom web designer (aka $3,000+), you probably won’t believe how affordable this is.
Let me show you.
First Off: How Is This Actually Possible?
That’s a great question.
There’s a few unique things about this process that makes it possible actually to build and launch your yoga website in one day.
- We’re using a template. Not a Wix or Squarespace template that you need to customize beyond recognition to make any sense as a yoga website – but a template that is designed specifically for yoga teachers.
- You get to do some homework before you begin. Instead of diving in and trying to build a website without a plan, you’ll need to prepare some things first. I’ll talk about that more soon.
- You don’t need to be good with computers. These templates come with step-by-step instructions holding your hand so thoroughly that your grandma could do it. Yogis weren’t destined to spend their lives in front of the computer, so we’re not going to.
- It doesn’t matter if you have no style. Because, unlike many themes out there, these ones are already stylish. That’s taken care of for you.
TL;DR: the foundation is already there for you – unlike custom website builds from scratch or generic website themes, this gives you a HUGE head start, making the building process so much faster.
Let’s get you prepped.
Before You Begin: Getting Prepped
Instead of running around the internet like a headless chook looking for things to fill your website with, I’ve gone ahead and created a nice list (click here for the full checklist) so you know everything to prepare before you even start designing.
Having all of this ready will make you much more efficient because you’re not forcing your brain to switch tasks every 20 seconds.
Here’s what you’ll need:
1: Your photos.
These can be from a professional photoshoot (ideally – check out Yogaroo for yoga specialised pics) – you can also substitute some photos with stock photos (I love Pexels and Unsplash for unique free stock photos).
Wherever they’re from, gather all your photos in one folder so they’re easy to find.
2: Your website text.
I recommend breaking it up into sections like this:
- About you (your story and experience).
- Descriptions of each of your services.
- Any information about your special events and workshops.
- Client testimonials.
Add these to a Google Doc or easy-to-find folder.
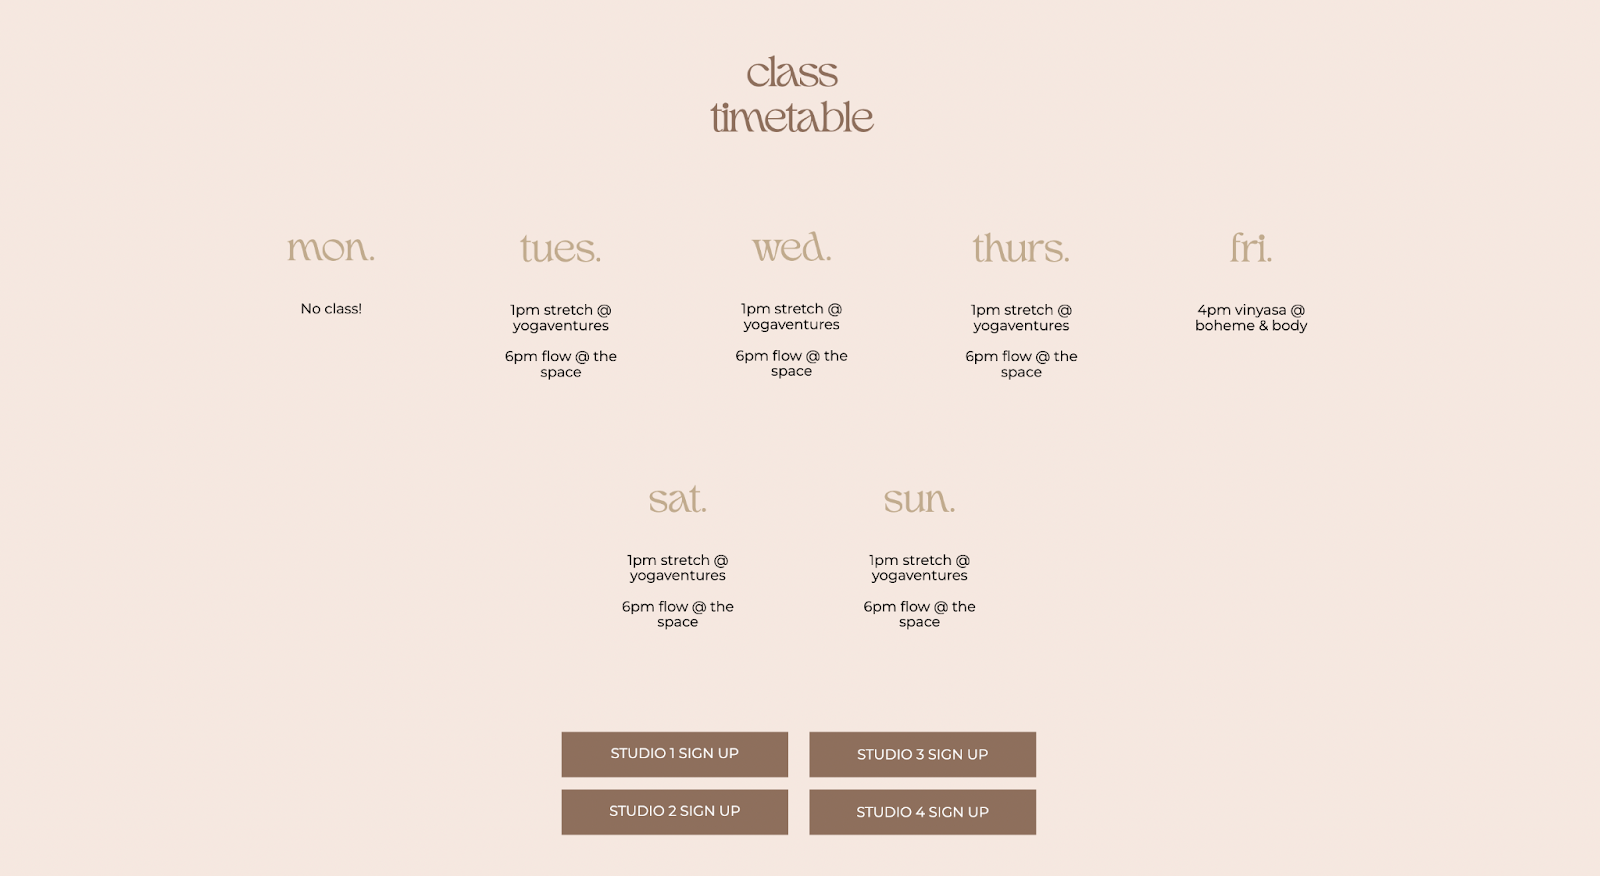
3: Your class timetable.
List out all of your classes for each day, making sure you include the following for each class:
- time
- Class name
- Studio
Then write a list of links to your studios (so your students can easily sign up).
Now you’re ready! It’s time for your design day.
Pour yourself a nice cup of tea and prepare to bring your dream website to life.
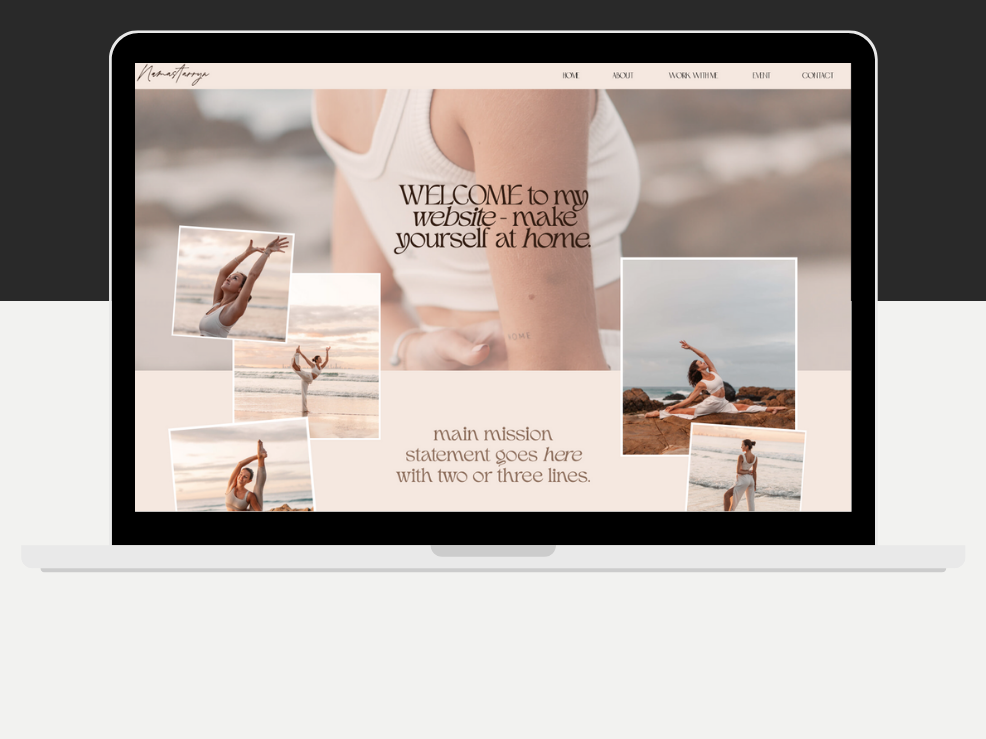
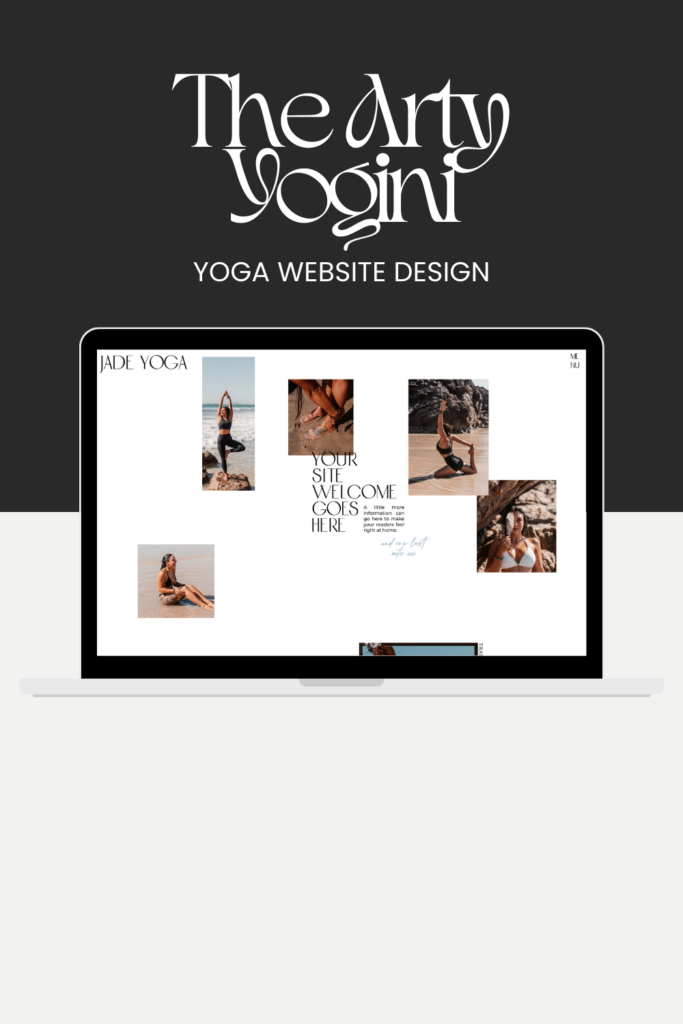
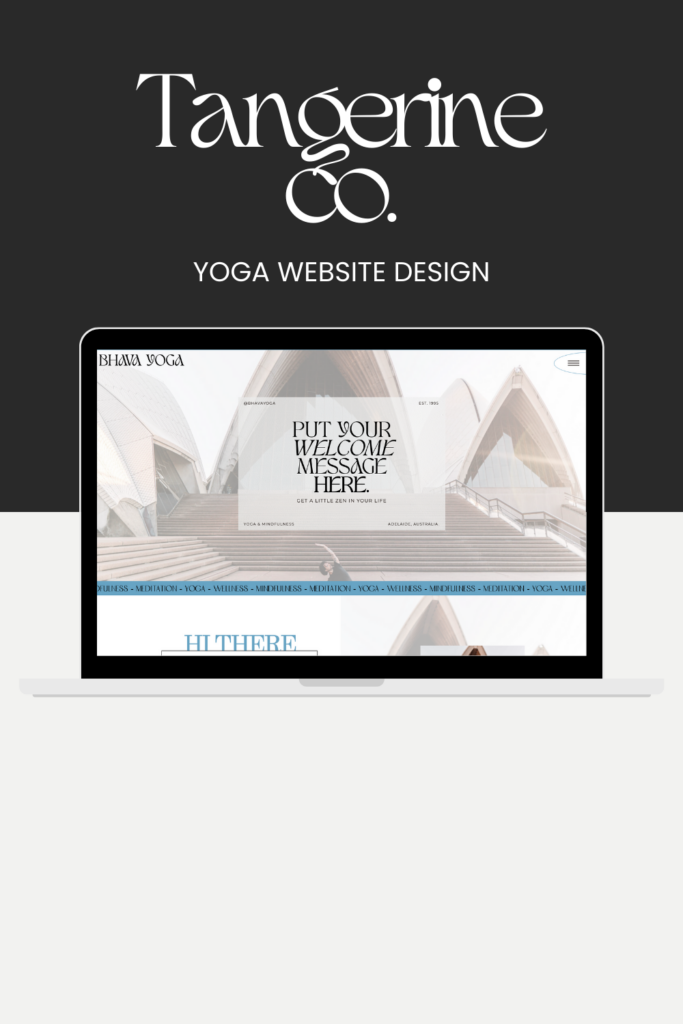
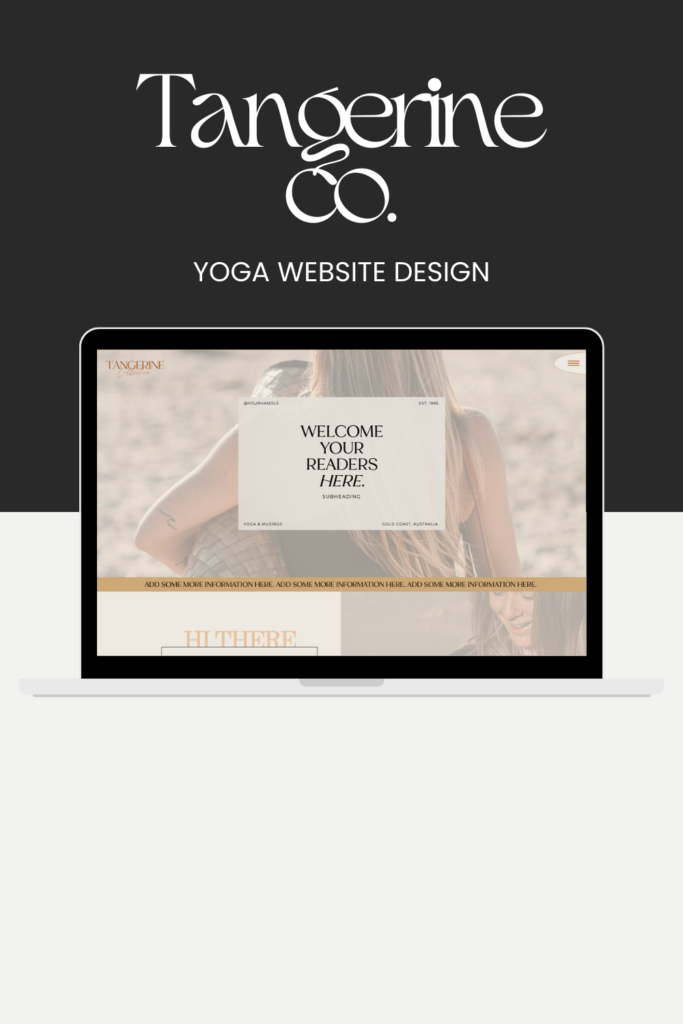
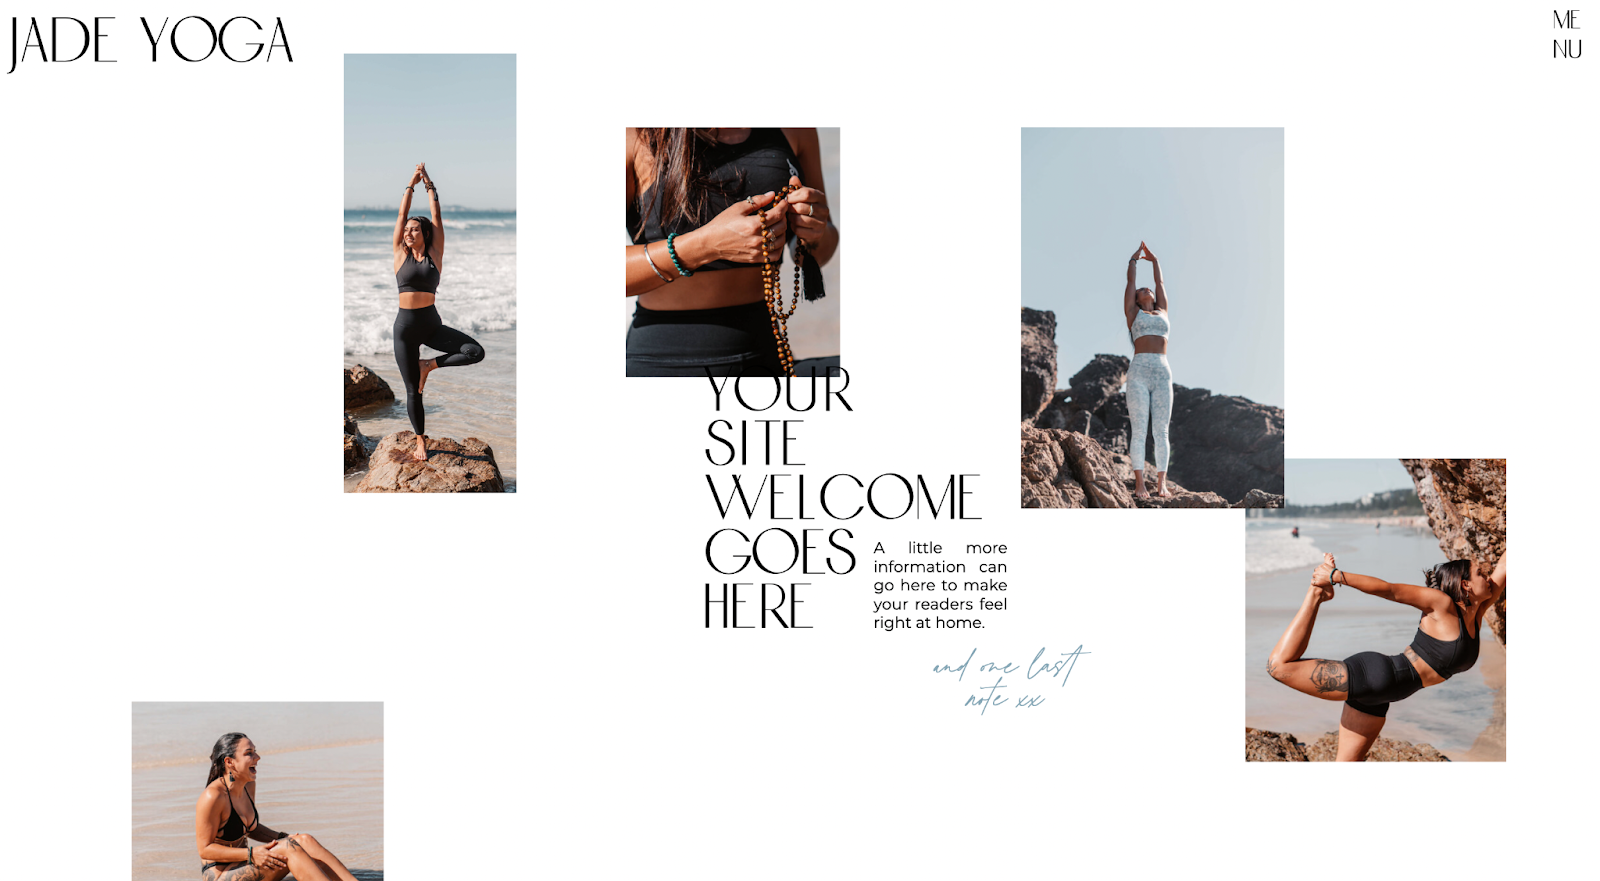
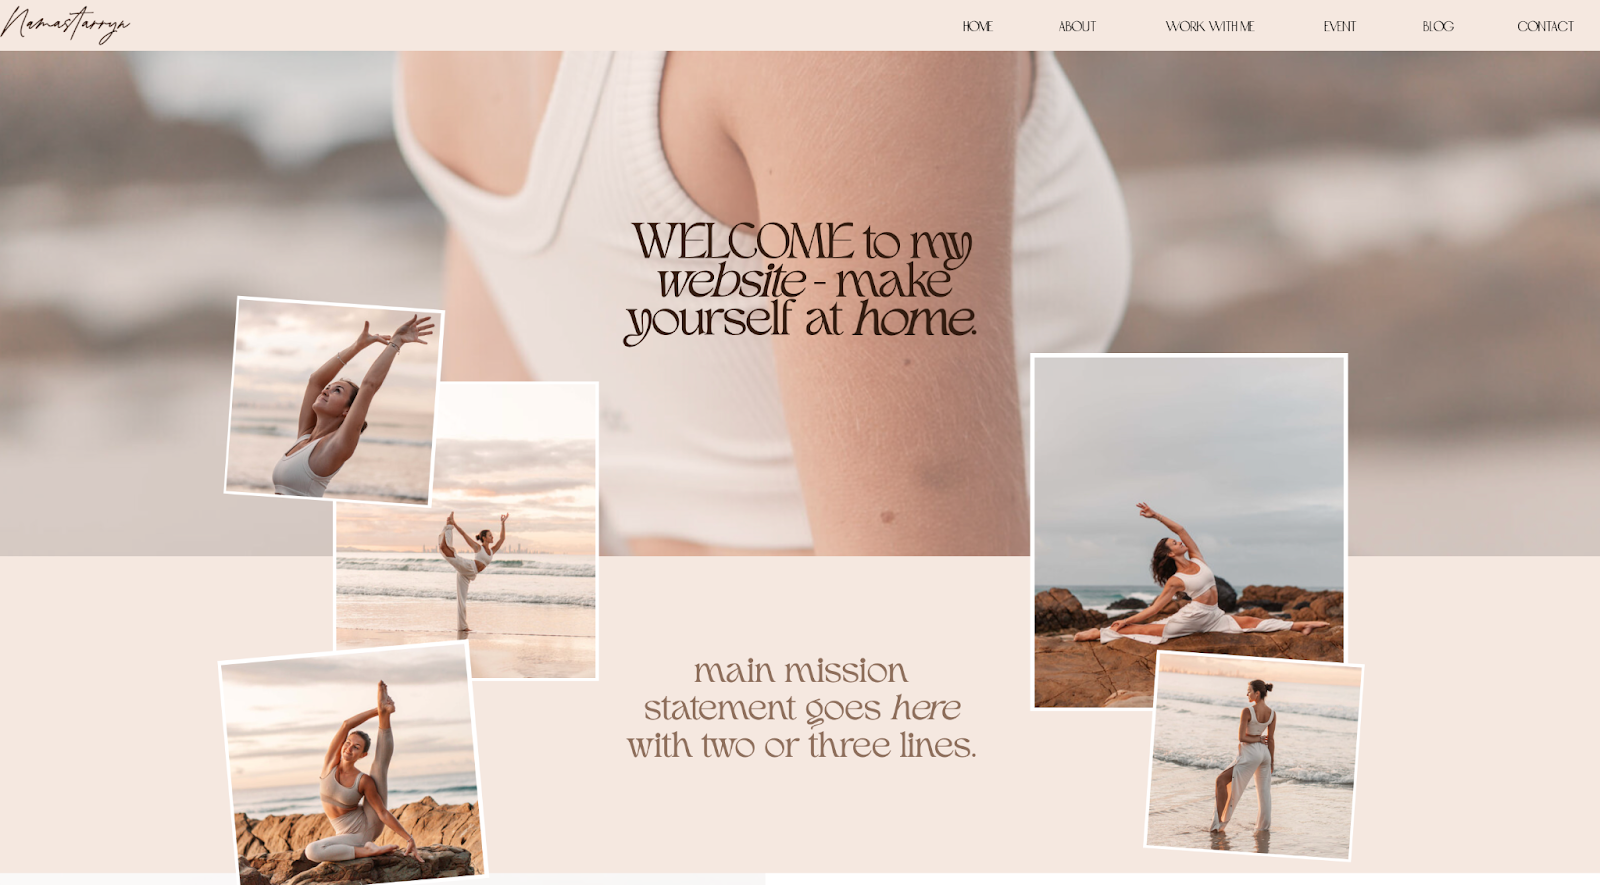
Step 1: Choose A Template
Yogi Web is the secret sauce to building your website in a single day. When you start with a foundation as solid as this, the rest becomes easy.
Unlike any other themes, Yogi Web templates are specifically designed for yoga teachers so it already has all the information you need – aka: you’ve already saved the time you could’ve wasted attempting to adapt a Wix template.
Simply pick your favourite design and purchase it (get 15% off with the code “GWEN15”) – they’re super affordable and come with walk-through instructions on how to edit them.
Step 2: Add Your Photos
Aren’t you glad you organised these yesterday? Now you can easily drag and drop your entire folder into the website and start replacing the template photos with your own.
This should only take an hour, and the instructions provided with the templates will walk you through exactly how to do it (you probably won’t even need them since it’s just a simple double-click situation).
Step 3: Add Your Text
Take a moment to appreciate your organisation as you breeze through this!
Simply copy and paste your text into the text boxes provided – the template gives you guidelines on what to put where so you won’t need to guess.
This should only take 2-3 hours.
Step 4: Add Your Timetable
Add your classes into the spaces provided with the time, location and class name.
Then update the studio buttons to include your studio links. (This has a complete walk through in the template education, so don’t panic if it sounds hard – it’s really easy to follow).
This should take an hour, tops!
Guess What? You’re Already Ready To Launch (If You Want)
If you’re happy with the template and don’t want to adjust the colours or fonts – it’s go time! Simply follow the instructions in the educational videos to launch your site.
This will easily be completed in an hour.
But if you’re noticing that you still have 3 hours to spare and you want to take it a step further, it’s time to customise! These are bonus steps, should you choose to take them:
(Optional) Step 5: Customise Your Colours
Let’s take it to the next level!
The website templates come with a free branding kit – you can use it to extract colours from your photos if you’d like to – or just pick colours on the website builder.
Start by updating the website “global colour settings” for fast changes (this will update ALL the website colours to your chosen colours). Then go through the website and adjust any stray colours as needed.
This should take you an hour.

(Optional) Step 6: Customise Your Fonts
If you want to import your own fonts or use the existing library of Google Fonts, you can update that like you did with the colours: start with the global settings for big, fast changes – then refine the details on the website.
This should take an hour, maybe an hour and a half if you need to adjust the font sizes!
Final Step: Launch!
Now you’ve completed your fully custom DIY website; you’re ready to launch! Just follow the instructions provided to publish your website.
Optional But Important Step: Swoon Over Your Dream Website
Pour yourself another tea and give yourself some serious congratulations – you just built a whole damn website in a day! That’s incredible. Not only that – it’s all yours. It’s time to proudly share your work with your clients, employers, family and friends. And to never watch a confusing YouTube tutorial again.
It’s Your Choice
Now, you face a choice.
You can keep struggling with Wix, pour money into an expensive custom designer – or you can trust yourself and invest in a website that was literally built for you.
The choice is yours!
Click here to check out Yogi Web templates – use the discount code “GWEN15” for 15% off all website templates!


view + leave comments . . .